Who can resist chocolate shapes, right? They’re a delicious treat – whether you’re using them to decorate cakes, share with friends and family, or simply indulge your sweet tooth. Creating beautiful and delectable chocolate shapes is fun and easy, and it doesn’t require professional chef skills. In this article, we’ll guide you through the process, from melting the chocolate to forming unique shapes.
From milk chocolate and white chocolate to delicious chocolate bars, there are endless possibilities for creating awesome shapes. All you’ll need are a few simple tools such as a baking sheet, a piping bag, cookie cutters, and a sharp knife. The key to success in working with chocolate is ensuring it’s melted smoothly and properly – and that can be achieved using a double boiler, microwave, or even a pot on the stove. No matter your preferred method, you’ll want to be cautious not to overheat the chocolate, as it can become too thick and hard to work with.
Once you’ve melted your chocolate, let your creativity run wild – it’s time to shape your masterpiece! You can create a variety of shapes by pouring the melted chocolate into cookie cutters or silicone molds, spreading it on a baking sheet and cutting it with a sharp knife, or even using a piping bag to draw your own designs. After you’ve formed your shapes, let them cool completely on parchment paper before transferring them to the freezer or fridge to set. Remember, practice makes perfect – so don’t be afraid to create and explore new designs, as each one will be a memorable and delicious creation!
Crafting Personalized Chocolate Shapes

Creating personalized chocolate shapes is a fun and easy way to surprise loved ones, decorate cakes, or make memorable gifts. There are several methods for crafting these delicious chocolate shapes that let you unleash your creativity and add a unique touch to any special occasion.
First, prepare your work area and gather all the necessary supplies for making the chocolate shapes. You’ll need:
- A selection of high-quality milk chocolate or white chocolate bars.
- A baking sheet, lined with parchment paper.
- Cookie cutters in various shapes, or a sharp knife to cut custom designs.
- A microwavable bowl and spoon for melting the chocolate.
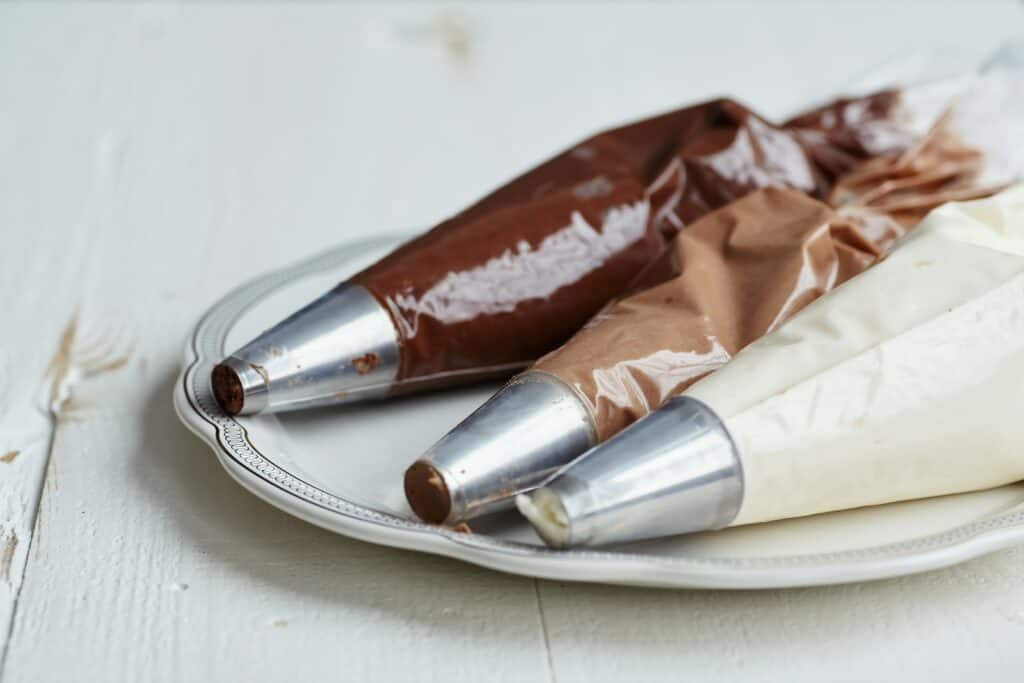
- A piping bag or a resealable plastic bag with the corner snipped off.
Next, break your milk chocolate or white chocolate bars into pieces and place them in the microwave-safe bowl. Melt the chocolate in the microwave using 30-second intervals, stirring at each interval to ensure a smooth, lump-free consistency. Be careful not to overheat the chocolate as it can become too thick and difficult to work with.
Once your chocolate is melted, you can either pour it directly onto the baking sheet or use a piping bag to create more intricate designs. If using cookie cutters, pour the melted chocolate into the cookie cutter on the baking sheet, filling each shape evenly. Tap the baking sheet gently on the counter to remove any air bubbles and ensure an even surface.
To create custom designs without cookie cutters, pour the melted chocolate into the piping bag and carefully draw your shapes onto the parchment-lined baking sheet. You may also add a few drops of food coloring to white chocolate to create colored designs.
After your shapes have been formed, transfer the baking sheet to the refrigerator or freezer to quickly cool and set your chocolate creations. Once they’ve hardened, remove your chocolate shapes from the cookie cutters or the parchment paper using a thin spatula or your hands.
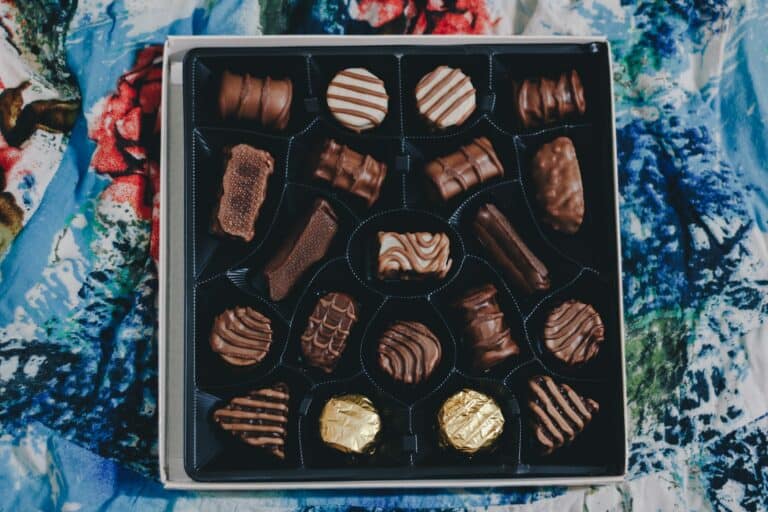
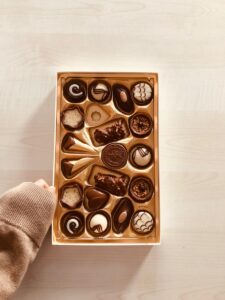
Finally, you can use your personalized chocolate shapes to decorate cakes, package in a decorative box for a special gift, or even incorporate a unique logo or message for a branded event. The possibilities are endless with this fun and creative dessert idea, so don’t be afraid to experiment and try new shapes and designs.
Techniques for Molding Your Chocolate
Molding chocolate shapes can seem like a daunting task, but fear not! It’s easier than you think with a few simple techniques. Whether you want to create delicious chocolate treats for a special occasion or just for fun, these methods will help you achieve your desired look.
- Melted Chocolate: First, you’ll need to melt your milk chocolate or white chocolate until it’s smooth and creamy. You can do this by using a microwave in short intervals or by placing the chocolate in a heatproof bowl over a pan of simmering water. Remember to stir regularly to avoid scorching or burning the chocolate.
- Baking Sheet Method: Once your chocolate is melted, pour it onto a parchment-lined baking sheet and spread it evenly using a spatula. Let it cool and harden in the refrigerator for about 15-20 minutes. After it has cooled, you can cut out your desired shapes using cookie cutters or a sharp knife. Carefully remove your shaped chocolate pieces and store them in an airtight container.
- Piping Bag Method: Fill a piping bag with your melted chocolate and create your desired shapes on a parchment paper-lined baking sheet. You can use this method to decorate cakes or make finer chocolate shapes like letters or intricate designs. Allow the chocolate shapes to cool in the fridge for about 15-20 minutes.
- Molding with Cookie Cutters: Grease the insides of your desired cookie cutters with cooking spray. Place them on a parchment-lined baking sheet, and carefully pour the melted chocolate into each cutter, leveling off the top with a spoon. Refrigerate for about 15-20 minutes, then gently ease out the chocolate shapes. This method allows you to create more intricate chocolate shapes.
- Adding Colors and Flavors: To create fun and vibrant colored chocolates, use white chocolate and add a few drops of food coloring to the melted chocolate. Be cautious not to add too much food coloring, as it can affect the chocolate’s texture and taste. Additionally, you can add flavor extracts or oils to the melted chocolate to create unique taste combinations.
Remember to use quality chocolate for the best results. It’s crucial to have a smooth and creamy texture, so your chocolate molds hold their shape and look professional.
Endless Possibilities: Popular Chocolate Shape Ideas
When it comes to chocolate shapes, your creativity knows no bounds. There’s an endless array of possibilities for making delicious chocolate shapes out of milk chocolate, white chocolate, and even dark chocolate! Here are some popular ideas for creating fun and memorable chocolate shapes.

- Basic Chocolate Shapes: Melt your favorite milk, white, or dark chocolate and spread it evenly onto a baking sheet lined with parchment paper. Let the chocolate cool in the fridge or freezer for a few minutes. Once cooled, use cookie cutters or a sharp knife to create your desired shapes. You can also use a piping bag to make intricate designs.
- Chocolate Lollipops: Melt your choice of chocolate, and then spoon or pour the melted chocolate into lollipop molds. Stick a lollipop stick into each mold and let them cool. Once set, pop your delicious chocolate lollipops out of the molds and enjoy!
- Chocolate Letters and Numbers: Using a steady hand, pipe the melted chocolate onto a baking sheet lined with parchment paper to create letters, numbers, or even words using your favorite type of chocolate. Let them cool before using them to spell out names or messages.
- Chocolate Decorations: Melted chocolate can be used to decorate cakes, cupcakes, and other desserts. Simply pipe small chocolate shapes, like hearts, stars, or flowers, onto a piece of parchment paper and let them cool. Once set, use them to add a touch of chocolatey elegance to your dessert creations.
- Custom Chocolate Shapes: If you have a specific shape or design in mind that may not be available in the form of cookie cutters or molds, you can always create your own! Draw or print out your desired shape on a piece of paper and place it under a sheet of clear plastic wrap on a baking sheet. Trace the shape with a piping bag filled with melted chocolate and let it cool.
- Branded Chocolates: For businesses and events, custom chocolate shapes can be a memorable and tasty way to promote your brand. Many companies offer chocolate molding services, where you provide your logo or design, and they’ll create a mold to produce custom chocolates in your desired shape and type.
These are just a few ideas to get your creative juices flowing. The world of chocolate shapes is vast and full of possibilities. So, don’t be afraid to experiment, have fun, and remember: when it comes to chocolate, there’s always room for more deliciousness!
Tips for Successfully Shaping Chocolate
Creating chocolate shapes can be a fun and festive way to personalize your desserts. Whether you’re looking to decorate cakes or make unique gifts, these handy tips will help you achieve delicious and visually appealing results.
First, select the type of chocolate you’d like to use. You can choose from a variety of options—such as milk chocolate, white chocolate, or even flavored chocolates. Remember that high-quality chocolate will deliver a better taste and overall experience.
Next, to create your chocolate shapes, you’ll need to properly melt the chocolate. Use a double boiler or microwave to gently heat the chocolate, ensuring it doesn’t burn or scorch. Periodically stir the melted chocolate to achieve a smooth consistency.
Once your chocolate is melted, it’s time to shape it. You can use cookie cutters, silicone molds, or even your hands to create various shapes. If you’re using cookie cutters, make sure to use a sharp knife to cleanly cut around the edges. Alternatively, you can use a piping bag to pipe the chocolate directly onto a baking sheet covered with parchment paper. Be creative and experiment with different methods to find what works best for you.
Here are some additional tips to help you during the process:
- Chill the baking sheet in the fridge or freezer for a few minutes before piping or spreading the chocolate. This will help solidify the shapes quicker.
- If working with white chocolate, you might want to add a few drops of oil-based food coloring to create a fun pop of color. Be cautious with the amount of coloring, as too much can alter the chocolate’s consistency or taste.
- Try creating multiple layers of chocolate for a unique and delicious effect. Allow each layer to cool before adding the next one.
- To preserve the quality of your chocolate shapes, store them in an airtight container at a cool room temperature. Avoid placing them in the refrigerator, as it may cause condensation and affect the chocolate’s texture and appearance.
In summary, creating chocolate shapes is a simple and rewarding process. With these tips and a bit of practice, you’ll be on your way to making memorable and delicious chocolate creations for every occasion. Enjoy experimenting with different methods and techniques to find your own signature style!
The Role of Temperature in Chocolate Shaping
When working with chocolate shapes for your delicious chocolate creations, it’s crucial to understand the role temperature plays in the process. Whether you’re creating fun shapes with milk chocolate, white chocolate, or even dark chocolate, managing temperature is the key to achieving the perfect texture and shape.
To start, let’s discuss melting chocolate. When you want to create various chocolate shapes, you’ll need your chocolate to be in a smooth, melted state. Using a double boiler or a microwave, heat your chocolate until it’s fully melted. Be cautious not to overheat the chocolate, as it can cause it to seize and become unusable. Ideally, aim for a temperature range of 86-90°F for milk or white chocolate and 88–91°F for dark chocolate.
Once your chocolate is melted, you have a few options for creating your desired shapes:
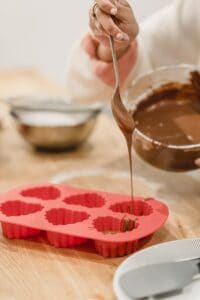
- Pouring: You can pour the melted chocolate into silicone molds or create unique shapes directly on a lined baking sheet.
- Piping: Fill a piping bag with your melted chocolate and pipe shapes onto a lined baking sheet or directly onto desserts such as cakes.
- Using cookie cutters: Pour the melted chocolate onto a lined baking sheet, spreading it evenly. Once it’s partially set, use cookie cutters to create shapes before fully cooling.
- Hand-cutting: You can also use a sharp knife to cut out shapes from a cooled and firm sheet of chocolate.
To make sure your chocolate shapes hold their form, it’s essential to cool them properly. Place your shaped chocolates in the fridge or freezer to speed up the cooling process. Once the chocolate has completely cooled and hardened, remove it from the fridge or freezer, being careful not to break the delicate shapes.
Temperature also plays a role in the quality and texture of the final chocolate shape. When it comes to creating chocolate shapes that are smooth and bubble-free, tempering chocolate before shaping is essential. Tempering involves heating and cooling the chocolate in a controlled manner, ensuring a glossy finish and a satisfying snap. It’s especially important for high-quality chocolates you may use to decorate cakes or for display.
Final Thoughts: The Art of Chocolate Shapes
The art of chocolate shapes is a delightful way to bring your creativity to life, while satisfying your cravings for delicious chocolate. There are various methods to create these delights, and as you’ve learned, you can achieve different results by using milk chocolate, white chocolate, and even melted chocolate.
When making chocolate shapes, you’ll need a few tools and supplies, such as:
- Baking sheet
- Piping bag or plastic bag with a small hole cut in one corner
- Cookie cutters or sharp knife
- A few drops of food coloring, if desired
- Wax or parchment paper
By experimenting with these tools, you’ll be able to create a wide range of chocolate shapes. Some fun ideas include using melted white or milk chocolate to create abstract designs or cutting out shapes from a cooled chocolate bar. These versatile chocolates can be used to decorate cakes, share as tasty gifts, or enjoy as a memorable dessert.
The process of creating chocolate shapes involves carefully melting the chocolate, ensuring a smooth texture and avoiding bubbles. It’s important to regulate the heat level to prevent burning the chocolate. You may also need to refrigerate or chill the chocolate shapes for a short period, allowing them to firm up and hold their shape.
With these techniques, you’ll soon be mastering the art of chocolate shapes, impressing your friends and family with your culinary creations. Whether you use these shapes for special occasions, holidays, or simply to indulge in some delicious sweetness, it’s always a fantastic idea to bring your imagination to life in the form of delectable chocolate treats.
In the world of chocolate shapes, the only limit is your creativity. So, don’t be afraid to experiment, try new ideas, and most importantly, have fun while indulging in the yummy goodness of chocolate.